8
Buying a new car is supposed to be an exciting experience, but the finance office experience often introduces a frustrating curveball: mandatory or heavily pushed dealer add-ons. Among the most common unwanted extras are pre-installed paint protection packages. Whether it is a partial paint protection film on the hood, edge guards on the doors, or a chemical sealant baked onto the clear coat, many vehicle owners find themselves paying for products they never actually wanted. Over time, these low-quality dealer installations can yellow, peel at the edges, trap dirt, or simply look unappealing, making removal a top priority.
Removing dealer-applied protection requires patience, the right tools, and an understanding of automotive paint safety. Rushing through the process or using improper instruments can easily scratch your clear coat or leave behind stubborn adhesive that is even harder to tackle. Whether you are dealing with a physical film or a chemical coating, taking the proper approach ensures your car’s paint remains pristine underneath.
Identifying What Kind of Protection You Have
Before you grab a heat gun or a bottle of solvent, you must determine exactly what kind of paint protection the dealership applied. Not all products are created equal, and each requires a completely different removal strategy.
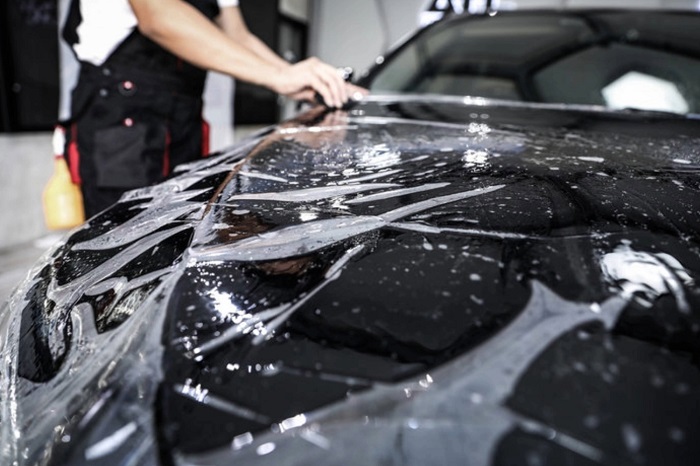
Paint protection film, commonly referred to as PPF or a clear bra, is a thick, transparent urethane film applied to high-impact areas like the front bumper, hood, side mirrors, and door cups. If you can catch an edge with your fingernail and feel a distinct plastic barrier, you are dealing with physical film.
On the other hand, if the surface feels glass-smooth and water beads up aggressively, the dealer likely applied a chemical sealant or a low-grade ceramic coating. These products do not have a physical edge to peel up because they bond chemically with the clear coat. Understanding this distinction saves you from wasting time trying to peel a chemical coating or attempting to polish off a thick urethane film.
Removing Dealer-Installed Paint Protection Film
If your car features a clear bra, door edge guards, or full-panel wrap installed by the dealership, removing it safely is entirely manageable at home with a few basic supplies.
Essential Tools for Film Removal
-
A quality heat gun or a standard household hair dryer
-
Plastic razor blades or automotive trim removal tools
-
Automotive adhesive remover
-
Clean microfiber towels
-
Isopropyl alcohol and water mixture
The Step-by-Step Removal Process
Start by parking your car in a warm garage or directly under the sun for an hour. Heat is your best friend when removing automotive films because it softens the adhesive backing, allowing the vinyl or urethane to stretch and release without tearing.
Turn on your heat gun to a low or medium setting. Hold it roughly six to eight inches away from the film and sweep it back and forth continuously. Never hold the heat gun in one spot, as excessive heat can bubble or burn your car’s clear coat. Warm the section for about thirty seconds to a minute until the film feels warm to the touch, not hot.
Find an edge or a corner of the film. Using your fingernail or a plastic razor blade, gently lift the edge. Once you have a secure grip, peel the film back at a sharp, low angle—ideally at a one-hundred-and-eighty-degree angle relative to the car body. Pulling straight up at a ninety-degree angle drastically increases the risk of snapping the film or leaving heavy adhesive behind.
As you pull, continue applying heat just ahead of the peeling line. If the film starts to resist or tear, stop, apply more heat, and resume slowly. Patience is critical during this phase. Tearing the film into tiny pieces will turn a one-hour job into an afternoon-long chore.
Tackling Stubborn Adhesive Residue
Once the physical film is gone, you will almost certainly be left with a hazy, sticky layer of adhesive residue clinging to the paint. This is entirely normal, but it can be frustrating to clean if you approach it incorrectly.
Never use harsh household chemicals, abrasive scouring pads, or metal scraper blades to remove this glue. Instead, apply a dedicated automotive adhesive remover to a clean microfiber towel or spray it directly onto the affected area. Allow the product to dwell for one to two minutes so it can break down the chemical bonds of the glue.
Gently agitate the area with your microfiber towel using circular motions. You should feel the adhesive ball up and dissolve under the towel. For stubborn patches, a plastic razor blade used flat against the paint can help scrape away loosened residue without gouging the clear coat. Once the glue is gone, wipe the panel down immediately with an isopropyl alcohol and water solution to strip away any oily residue left behind by the adhesive remover.
Removing Dealer-Applied Chemical Sealants and Coatings
If the dealership sold you a chemical paint sealant, polymer coating, or entry-level ceramic coating, the removal process relies on chemical breakdown and mechanical decontamination rather than peeling.
Dealership sealants typically degrade naturally over three to six months, but if you want to strip it off immediately to apply your own professional-grade coating or wax, you need a dedicated paint cleanser. Start by giving your car a thorough wash using a strip wash shampoo designed specifically to strip away existing waxes and sealants.
If a standard strip wash does not fully remove the dealer protection, use a clay bar or a synthetic clay mitt along with a dedicated clay lubricant. Gently glide the clay across the paint surface to shear away bonded surface contaminants and the remaining chemical layer. Following the clay treatment, a light polishing step using a dual-action polisher and a finishing polish will completely level the clear coat, stripping away any lingering dealer product and restoring a mirror-like finish to your vehicle.
Post-Removal Paint Correction and Protection
Removing pre-installed film or coatings often exposes paint that has been shielded from UV rays and environmental fallout for months or years. However, the mechanical friction of removal can also introduce very fine micro-marring or swirls into the clear coat.
Inspect your paint under direct lighting to check its condition. If you notice minor surface imperfections, take the time to perform a light polish. Polishing not only enhances gloss and clarity but also provides a perfectly clean, flat surface for whatever new protection you choose to apply.
Once the paint is thoroughly cleaned, polished, and wiped down with an isopropyl alcohol solution to remove polishing oils, you must protect it immediately. Unprotected clear coat is vulnerable to oxidation, bird droppings, and UV damage. Apply a high-quality carnauba wax, a durable synthetic paint sealant, or a modern consumer-grade ceramic coating to lock in the finish and ensure your car’s exterior remains shielded on your own terms.
When to Call a Professional Detailer
While removing dealer-installed protection is a rewarding DIY project, there are times when professional intervention is the wiser choice. If the vehicle is several years old and the film has baked under the sun to the point where it is brittle, cracking, or shredding into microscopic flakes, attempting to remove it yourself can easily result in paint damage.
Similarly, if you peel away the film and discover fading, paint discoloration, or clear coat failure underneath, stop working immediately. A professional detailer has specialized steam equipment, chemical dissolvers, and paint depth gauges that allow them to tackle severely neglected surfaces without stripping through your factory clear coat. Recognizing your limits saves you from costly trips to the local body shop for paint repainting.
Taking control of your car’s exterior finish empowers you to maintain your vehicle according to your own standards rather than settling for low-quality dealership add-ons. With the right tools, plenty of patience, and a methodical approach, you can strip away unwanted protection and reveal the stunning paintwork hidden underneath.